MAKE BOOTABLE USB DRIVE | Make USB Bootable
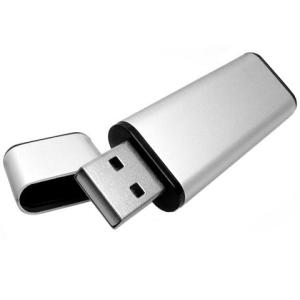
Make Bootable USB drive. The steps to make a USB Drive bootable. The usb hardware can be made bootable. Bootable USB drives are useful to users mostly when their DVD/CD ROM drive is broken, or not working. At that point of time, bootable USB drives are required to accomplish task.

Now question is how to make bootable USB drives. You dont have to worry in that case because now you can create bootable USB drives on your own and that too in very easy steps.
Make Bootable USB Drive
I will divide the article for Both Windows and MAC.
HOW TO MAKE BOOTABLE USB DRIVE on Windows
- Download/install the HP USB Disk Format Tool (Windows).
- Download the Windows 98 system files from EXTREME Overclocking.
- Create a new folder and extract all the files (Windows 98 system files) into that new folder.
- Make sure that the USB drive is unlocked.
- Plugin the USB drive into your computer’s USB port.
- Run the HP USB Disk Format Tool.
- Click on the drop-down list under Device and select the USB drive.
- For File system, select FAT32.
- In Format options, select/check Create a DOS startup disk.
- Select “using DOS system files located at:” and click on the small box with the 3 dots.
- Browse for the folder where you extracted the Windows 98 system files and click OK.
- Click on Start button.
- It will display a warning message. Make sure you selected the right USB drive, if so then clickYes.
- The HP USB Disk Format Tool will format the USB key and copy the DOS system files into it.
- Click on Close, when done.
- Your bootable USB drive is created.
To make sure that all the right files were copied into the USB key, browse into the USB key and check that the following files are there – COMMAND.COM, IO.SYS and MSDOS.SYS. In you don’t see the files, you’ll have to make sure that your system allows you to view protected operating system files.
Make Bootable USB Drive on MAC
-
First, Connect USB drive (pen drive) into your computer.
-
Save the ISO file which you wish to Flash on your computer.
-
Open Spotlight and Type in terminal.
-
Double-click Terminal and Open a list of connected drives. Type diskutil list into Terminal, then press Return
-
Now Select your USB drive and Type diskutil unmountDisk /dev/disknumber—making sure to replace “disknumber” with the disk’s “IDENTIFIER” name and number (e.g., disk2)—into Terminal, then press Return.
-
Enter the formatting command. Type in sudo dd if= but don’t press the Return key
-
Drag the ISO file into the Terminal window. Click and drag the ISO file (or disk image file) that you want to boot into using the USB drive into the Terminal window. This will copy the file’s address into the Terminal command. You can also type in the folder path to the ISO file.
-
Press the Space key. This will put a space at the end of the file’s address, making room for the next command
-
Enter the rest of the command. Type in of=/dev/disknumber bs=1m, again making sure to replace “disknumber” with the USB flash drive’s number (e.g., disk2), and press Return.
-
Type in your password. This is the password that you use to log into your Mac. As you type, you’ll notice that the letters don’t appear in Terminal; this is normal
-
Press Return. Doing so submits your password and prompts your Mac to begin creating a bootable USB flash drive with your selected ISO or image file.
Signing Off
Personally speaking, bootable USB drives will definitely help you a lot. This will save money and time for you.
After you follow the steps, do share the experience with us in comments. If you know any other better alternative, we can publish your content with us. Enjoy 🙂


